Hello, my dear readers!
If anyone is interested in art but worried about potential art thieves (and don't want something obstructing the artwork itself), watermarking is for you!
We'll start by going to Picnik and opening up an image. (For the images used in this tutorial, simply click on them to enlarge them.)
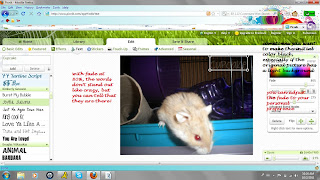
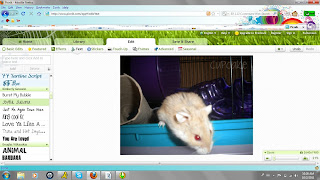
Below: Choosing an image to watermark. This is a picture of my hamster, Cupcake. So cute!
You'll be directed to a basic editing page where you can crop, resize, etc. The watermarking is in another tab, the text (unless you want to use a sticker as a watermark which wouldn't really be a good one to use)
This is the fun part. In comparison to Photobucket's photo-editing software, there are way more fonts to choose from in Picnik. Pick the one you would like to use, and enter your text for your watermark (the best watermarks are ones that have your name or the username for the site you upload your work on). In this case, I'm just going to put my hamster's name as the watermark.
Of course it's going to stand out like crazy when you first add it (which is why I don't recommend using a paint program to put a gray colored watermark - it still stands out like crazy). What determines the watermark is the opacity of it (think opaque like milk - you can't see through it; you want your opacity at a low percentile so that it's not as thick). However, in the case of Picnik, it's reversed to "fade"; where you want to increase that to decrease opacity.
Personally, I like having my fade level set at 80%. But that's my preference. If you like it a little less noticeable, increase the fade to a higher percentage. If you would want it to be more noticeable, decrease the fade.
Also, depending on the picture, you might want to alter the color. Picnik has it set on white as a default - which is good for darker colored photographs. If your watermark is going to be against a light part of the picture, you're probably going to want to set the color to black or gray, and then fade it to your preference.

And voila! You are finished. Enjoy!


No comments:
Post a Comment